13 years ago
Monday, September 30, 2013
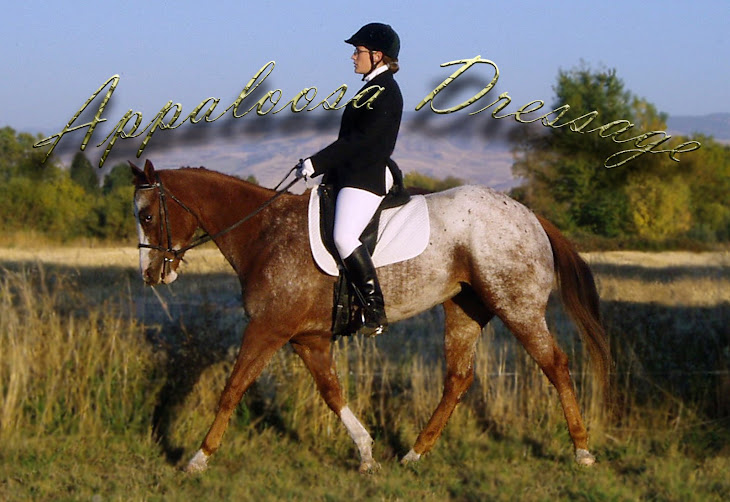
Last Show Of the Season
The last show of the year for me is next week in Pasco, WA. I just had a baby on Friday, so he'll be attending with me and my hubby is coming to make it all possible. We'll see how it goes! I have my herd trimmed down to only 59 horses instead of 110ish. Hopefully that will be manageable. I'm excited, but apprehensive since we aren't getting much sleep at this point. I have 3 horses I plan to show performance, hopefully that isn't too much!
Sunday, March 3, 2013
Breyer Horses
I have not updated in so long. I will have to update on how things went last summer. I attended two shows, had a great time, and then bought a ton more models over the winter. Enough that I probably need to sell some because I probably have too many for one person to show! I have two shows planned for this year, and a 3rd that will most likely be by proxy because I am due to have a baby right before it.
I have some customs that I finished (yey!), and a couple even earned ribbons. I have more to finish for this year's shows. Some of my OF's NANed at my 2nd show last year which made me very happy. I'm too far away to go to NAN, but I can still save cards and earn awards on my models. I have a big project to do before May when my next show is; I need to get my new horses ready to show! They need evidence cards, breeds assigned, leg tags, etc. And there are a bunch of them! I've been putting it off.
I will work on getting more organized and get pictures of things up. I did a nice binder of my ribbons to keep my NAN cards and ribbons organized and keep track of who won what.
Monday, July 9, 2012
Base Coat Experiment
Today I started my experiment on using a dark acrylic base and pastelling over it. First, I took the horse I prepped the other day and set up my station.


I sprayed it with matte finish.


Horse, dark brown paint, short/flat brush, paper towel on kitchen table.

Next, I put a coat of paint on the horse. I put a glob of paint on the paper towel to start with, but for the 2nd coat I just worked out of the bottle with the top off for less clean-up.

I held the horse by the tail to paint the bottom, minus the bottom of the feet, then set the horse down and carefully painted the tail without knocking it over.

After one coat.

After the second coat.
I sprayed it with matte finish.

Next, I took a q-tip and rubbed it on the black pastel. I followed my picture of a black bay to add darker points. Our lighting in the house is really bad, so it was hard to tell where I had black, but it looked neat in the living room. I will do more coats and hopefully it will muscly when I'm done.
And after two more coats on the pastel gang, here is the whole group at the end of today:

Sunday, July 8, 2012
Starting to look different
Well, today I got about 3 layers on, I don't know for sure, I didn't keep count. I watched some videos online last night and found some good tutorials. I didn't get to watch everything I wanted, but got some ideas to play around with.
I tried using a Q-tip to apply dust today, it seemed to work fine, not sure if it's better or worse than the brush. I also grabbed a clean make-up applicator to try but I didn't do anything with it yet today.
I also cut the bristles on my brushes a bit shorter in hopes to get more grinding action and less dusting. It worked great on two of them, one of them wasn't thick enough. I think I will have to get more brushes.
The other thing i did today was I started prepping another horse. I want to play with using a dark acrylic base and adding accents on top of it with the pastel. We'll see what happens, I'm just curious.
Some of the videos and galleries I was looking at mentioned that they used colored pencils on their horses. I have watercolor pencils and I'm curious if I can use those. I have to explore that more online, but I'm excited to try some different media and see what happens.
Here is my work station today:

You can see my reference photos and the brushes and colors set out on the left. I keep them all together with the right photo so I don't accidentally grab the wrong one. The in the middle, you see my towel work-space, the container lid that I brush over to lose as little dust as possible, the note where I wrote the goal coat for each horse so I don't forget if it's been a few days since working, the case of jars, the tv remote (catch up while you work!), and a horse. On the right, you see the pastels and the edge of the supply box with a piece of soft t-shirt for buffing in between coats.

Here is a close up of the work-space. I hold the horse over the lid so excess dust falls into it and can be reused, and I can set the horse on the towel if I need support from underneath to grind dust into the face or a small part like that. My list is on the left, and I was experimenting with q-tips today.

Here are my horses after today. It doesn't feel like they're changing, but looking at the photo from last session, I guess they are more colored. It's just really slow going. The final base coat color goal for each horse is; top left: black bay with a plan to be a paint in the end, top right: red bay, bottom left: chocolate brown, bottom right: gray with light points.
Saturday, July 7, 2012
Sucking it up and starting to color!
The other morning, I finished sanding and spraying 5 models, so I have 5 bodies ready to color. I spent a couple hours getting reference pictures ready. You need them to see where to put lighter color and darker color so that the muscles look more realistic than the original factory paint.
I got a set of little jars at Joann's to put my pastel powers in. I use a blade from the exacto knife set to shave powder off and then mix colors to get the right shade for each layer. I took white labels and wrote what coat color it is for so I remember. I spread out a cloth to work on.
Tips I've discovered in my first session of working all by myself; wash you hands a lot. After shaving and mixing each color into a jar, wash your hands before touching the horse you're going to color because somewhere on your hands is a big spot of color that will stick on the horse like a patch of bright colored glue. Label your jars, label your brushes. Remember which horse is going to be which color. They all look similar for a while, when the color is so light.
Here is my work space and the results of coat 1:
 Here is a closer shot of the reference photos and labels jars and brushes.
 Here are the 4 horses I started after one layer of pastel!

I got a set of little jars at Joann's to put my pastel powers in. I use a blade from the exacto knife set to shave powder off and then mix colors to get the right shade for each layer. I took white labels and wrote what coat color it is for so I remember. I spread out a cloth to work on.
Tips I've discovered in my first session of working all by myself; wash you hands a lot. After shaving and mixing each color into a jar, wash your hands before touching the horse you're going to color because somewhere on your hands is a big spot of color that will stick on the horse like a patch of bright colored glue. Label your jars, label your brushes. Remember which horse is going to be which color. They all look similar for a while, when the color is so light.
Here is my work space and the results of coat 1:


Wednesday, June 20, 2012
Progress Report On Prepping
The new primer seems to be great, if not fast-drying. I took my three bodies I'm doing at home to Shana's and she said I need to sand more and paint again, but that where I'm at is great, just not done. She thought my feet were really detailed and well done.
My big revelation was that I need finer sand paper. I used hers and it worked way better the finest of what I bought to try. So, now I know what I need! I also need more pastels. What I have will work, but I have half as many as she has and it makes it easier to have more and not have to mix.
I will get pictures up soon...I promise...maybe.
Saturday, June 16, 2012
My New Adventure: Breyer Horses
Since I sold both my horses (wow that was fast), but I am not ready to not be a "horse person" (that's just not going to happen), I decided to make an attempt at Model Horses. Now, I was never a kid who collected Breyers. Somewhere (still searching for them) I have three Breyers from my youth. I found out last summer that you can SHOW model horses. Somehow I had missed that memo.
I met a lady who shows Breyers and have been learning more about showing them and re-painting them. She is hosting a show in August and I bought a model in the out of the box classes and I'm working on a few customs to show in the custom classes. I will document my progress here!
So far, I have a model I'm working on at Shana's house, the lady helping me learn everything, and three more I'm working on at home. All of them are Stablemates.
I collected the tools Shana recommended. I picked a couple bodies from my box of NOT LSQ Stablemates and then I used an exact-o-knife to scrape off seams, carve out ears, and carve frogs into their teeny-tiny feet. That nearly gave me carpel tunnel, but the precision and repetitiveness appealed to my perfectionism.
Next, I sanded the bodies till I couldn't feel seams or knife marks. Yesterday, I got ready to paint them with the primer. Disaster! I used the same paint that I used at Shana's, but the stuff came out in too big of drops instead of a mist, got everywhere, dripped from the can, and dried in tiny bubbles on the horses! I was soo frustrated! Only one came out well enough to not start over. Talk about discouraging! Norman went to the store to try a different primer and returned with a different brand.
Today, I sanded the bubbles off the bodies and realized I hadn't gotten frogs carved on one, so I did that. Finally, I was ready to re-primer them. The new primer covered much better and other than a grass bug landing on the rump of the 2nd one and causing a minor tragedy it seemed to work better. The downside is that it claims to take 24 hrs to fully dry completely. But, I got the two bodies re-painted and they're drying. I think the primer will actually dry much faster on the horses because they're small and the paint doesn't need to be very thick.
When I get the energy, pictures of the "before" bodies will be up!
Subscribe to:
Posts (Atom)